아파치 사용할 때 Let’s Encrypt 인증서를 설치하는 내용을 다음 글에서 소개한 바 있습니다.
Nginx 사용할 때도 비슷한데, Let’s Encrypt 업데이트로 변동사항이 있습니다. 기존 ./letsencrypt-auto 명령 대신에 다음의 명령을 사용합니다. 아파치에 설치할 때와 같이 커맨드 라인에 아래 명령을 입력, 실행하면 메시지가 나올 겁니다. 언젠가 나오지 않을 수 있지만, 현재는 나옵니다.
// 커맨드 라인
#./certbot-auto
No installers seem to be present and working on your system; fix that or try running letsencrypt with the “certonly” command
위 내용은 서버에서 Let’s Encrypt 인증서를 위한 특정 설정을 미리 정의하여 설치 시도 시 나오지 않을 수 있습니다. 하지만 안해도 되는 것을 일부러 할 필요가 있을까 합니다. 메시지에서 두 번째로 권유하는 certonly 옵션만 사용하여 설치하는 것으로 충분합니다.
이 certonly 옵션은 지난 아파치 설치와 달리 인증서만 설치하겠다는 뜻입니다. 이 옵션을 제외하면 간단히 가상 호스트 설정 파일도 설치 시 자동으로 변경한다는 것인데 아파치는 가능하지만 현재 Nginx 경우는 지원하지 않습니다.
아래는 인증서를 설치한 간략 서버 환경입니다.
- Ubuntu 14.04
- Nginx 1.9.11
- PHP 7.0.2-2+deb.sury.org~trusty+1 (cli) ( NTS )
- PHP 7.0.3-5+deb.sury.org~trusty+1 (fpm-fcgi)
설치
서버 접근 후 root 계정으로 전환한 후 /root 경로에 다음 순서로 처리합니다. git 설치 전이며, 처음 설치라는 가정입니다.
# apt-get install git
# git clone https://github.com/certbot/certbot
# cd certbot
# service nginx stop
# ./certbot-auto certonly
# service nginx start
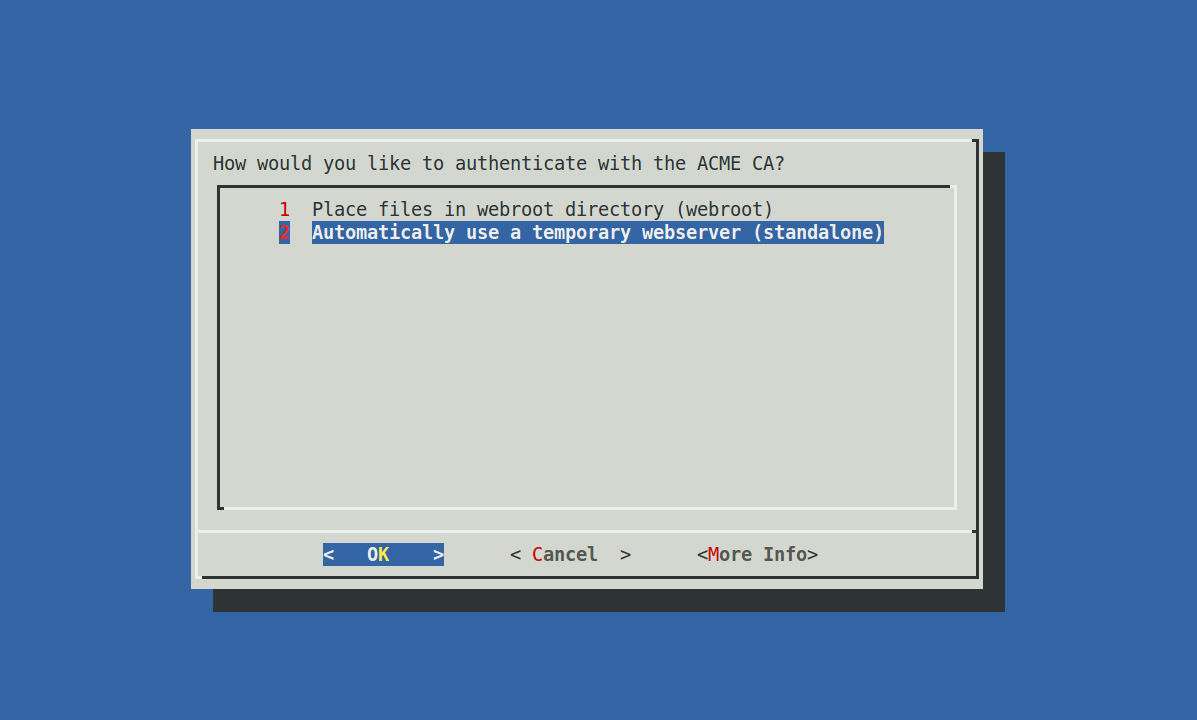
위의 순서로 진행하면 다음 그림을 볼 수 있습니다. Putty 유틸을 사용할 경우 문자가 제대로 표현되지 않을 수 있습니다. 감각이 뛰어나다면 그림을 보고 참고하여 설정 가능합니다. 또 그림은 직접 원하는 도메인을 입력하기 위한 방법입니다.


이 과정만 진행하면 인증서 설치는 사실 끝입니다.
갱신
갱신은 크론(Cron) 또는 갱신 안내 메일을 받으면 다음처럼 간단하게 처리할 수 있습니다. renew 옵션은 서버에 설정된 전체 도메인에 대한 갱신입니다.
// 만료일 전 직접 갱신
# cd /root/certbot
# ./certbot-auto renew

// Cron 설정 시
// 매일 04시 30, 31, 35분에 Nginx 중지, 갱신 확인, Nginx 재시작
// /var/log/letsencrypt 경로에 로그 기록

# crontab -e
30 04 * * * /etc/init.d/nginx stop
31 04 * * * /root/certbot/certbot-auto renew >> /var/log/letsencrypt/le-renew.log
35 04 * * * /etc/init.d/nginx start
위는 Nginx 서비스를 중지하고 갱신하는 것이므로 자신의 사이트 서비스 성격에 맞지 않을 수 있습니다. 서비스 중지 없이 갱신하는 방법은 아래 링크 참고하세요. 또 최초 한 번은 갱신 결과를 확인과 로그 파일을 확인하는 것이 좋습니다. 갱신 실패와 성공에 따라 다른 로그 내용을 확인할 수 있습니다.
크론을 통한 갱신은 뜻밖의 상황이 발생할 수 있으므로 하루 단위 (daily)로 정의할 것을 권장하고 있습니다.
적용
아파치의 경우는 (지난 글에서) 말 그대로 ‘자동’으로 설치하였으므로 인증서 설치 후 할 일이 없습니다. 물론 아파치도 certonly 옵션을 주고 직접 가상 호스트 설정 파일에서 정의해도 됩니다.
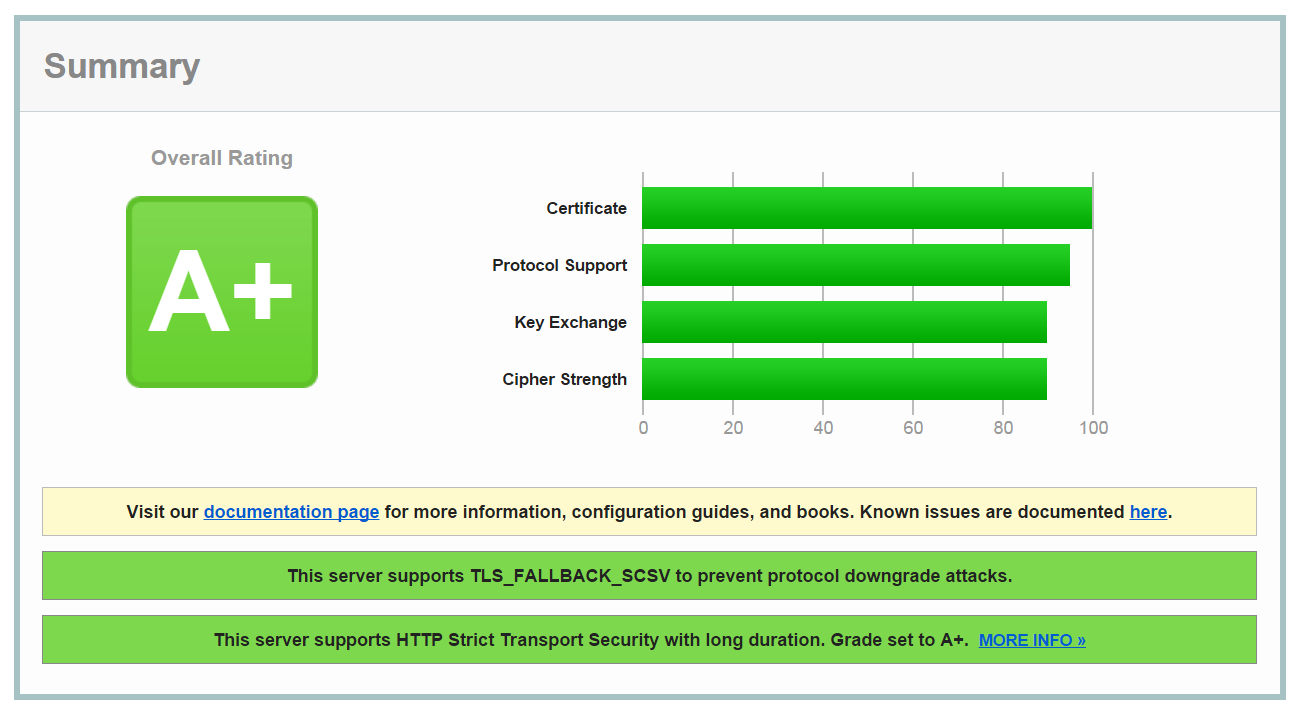
Nginx의 경우는 설정한 정보를 소개하는 것으로 정리합니다. 다음은 실제 사용하고 있는 설정을 약간 수정한 것으로 도메인은 가상입니다. 또 소위 A+ 인증서를 위한 설정입니다. Nginx에 Let’s Encrypt 인증서를 이 글처럼 certonly로 설치하고 인증서 키 파일 경로만 정의하면 B가 나오는 경우가 많습니다.
그리고 워드프레스 기준이며, http2, 80번 포트 접근은 443번 포트 리디렉트 기준의 설정입니다. 자신에게 맞게 일부 (경로 등) 수정이 필요할 수 있습니다.
server {
    listen 80;
    server_name yourdomain.com www.yourdomain.com;
    return 301 https://$host$request_uri;
}

server {
    listen 443 ssl http2;
    server_name yourdomain.com;
    root /home/your_account/www;

    add_header Strict-Transport-Security "max-age=31536000";
    add_header X-Frame-Options DENY;

    ssl on;
    ssl_certificate /etc/letsencrypt/live/yourdomain.com/fullchain.pem;
    ssl_certificate_key /etc/letsencrypt/live/yourdomain.com/privkey.pem;
    ssl_trusted_certificate /etc/letsencrypt/live/yourdomain.com/fullchain.pem; #Nginx 1.8 이상
    ssl_stapling on;
    ssl_stapling_verify on;
    ssl_protocols TLSv1 TLSv1.1 TLSv1.2;

    ssl_ciphers 'ECDHE-RSA-AES128-GCM-SHA256:ECDHE-ECDSA-AES128-GCM-SHA256:ECDHE-RSA-AES256-GCM-SHA384:ECDHE-ECDSA-AES256-GCM-SHA384:DHE-RSA-AES128-GCM-SHA256:DHE-DSS-AES128-GCM-SHA256:kEDH+AESGCM:ECDHE-RSA-AES128-SHA256:ECDHE-ECDSA-AES128-SHA256:ECDHE-RSA-AES128-SHA:ECDHE-ECDSA-AES128-SHA:ECDHE-RSA-AES256-SHA384:ECDHE-ECDSA-AES256-SHA384:ECDHE-RSA-AES256-SHA:ECDHE-ECDSA-AES256-SHA:DHE-RSA-AES128-SHA256:DHE-RSA-AES128-SHA:DHE-DSS-AES128-SHA256:DHE-RSA-AES256-SHA256:DHE-DSS-AES256-SHA:DHE-RSA-AES256-SHA:AES128-GCM-SHA256:AES256-GCM-SHA384:AES128-SHA256:AES256-SHA256:AES128-SHA:AES256-SHA:AES:CAMELLIA:DES-CBC3-SHA:!aNULL:!eNULL:!EXPORT:!DES:!RC4:!MD5:!PSK:!aECDH:!EDH-DSS-DES-CBC3-SHA:!EDH-RSA-DES-CBC3-SHA:!KRB5-DES-CBC3-SHA';

    ssl_dhparam /etc/nginx/ssl/yourdomain.com.pem;
    ssl_prefer_server_ciphers on;
    ssl_session_timeout 1d;
    ssl_session_cache shared:SSL:10m;

    access_log /var/log/nginx/yourdomain.com.access.log;
    error_log /var/log/nginx/yourdomain.com.error.log warn;

    location / {
        index index.php index.html;
        try_files $uri $uri/ /index.php?$args;
    }

    # Block dot file (.htaccess .htpasswd .svn .git .env and so on.)
    location ~ /\. {
        deny all;
    }

    location = /favicon.ico {
        log_not_found off;
        access_log off;
    }

    location = /robots.txt {
        allow all;
        log_not_found off;
        access_log off;
    }

    location ~* /(?:uploads|files|data)/.*\.php$ {
        deny all;
    }

    # Add trailing slash to */wp-admin requests.
    rewrite /wp-admin$ $scheme://$host$uri/ permanent;

    location ~* ^.+\.(ogg|ogv|svg|svgz|eot|otf|woff|mp4|ttf|rss|atom|jpg|jpeg|gif|png|ico|zip|tgz|gz|rar|bz2|doc|xls|exe|ppt|tar|mid|midi|wav|bmp|rtf)$ {
        access_log off;
        log_not_found off;
        expires max;
    }

    location ~ [^/]\.php(/|$) {
        fastcgi_split_path_info ^(.+?\.php)(/.*)$;
        if (!-f $document_root$fastcgi_script_name) {
            return 404;
        }

        fastcgi_pass unix:/run/php/php7.0-fpm.sock;
        fastcgi_index index.php;
        fastcgi_param SCRIPT_FILENAME $document_root$fastcgi_script_name;
        include fastcgi_params;

    }
}
마지막으로 DH Param 생성 과정을 진행합니다. 관련 내용은 글 하단 ‘SSL의 정석 (아파치 & nginx)’ 포스트로 이동하여 DH Param 부분을 참고하세요. yourdomain.com은 자신의 정보로 변경하세요.
# mkdir /etc/nginx/ssl
# cd /etc/nginx/ssl
# openssl dhparam -out yourdomain.com.pem 2048
서비스를 재시작 합니다.
//
# service nginx restart
사이트에 접속하여 확인하고, 다음 링크로 이동하여 인증서 점수도 확인해 보세요.

대부분 비슷합니다만, 다음 사이트에서 조금씩 참고한 것을 엮은 것입니다.
Let’s Encrypt Getting Started
WordPress Codex, Nginx
NGINX Installation
SSL의 정석 (아파치 & nginx)
[…] 정석 (아파치 & nginx) ,Let’s Encrypt, Nginx ,How to Install nginx and google PageSpeed on Ubuntu 16.04 (Xenial […]
[…] 정석 (아파치 & nginx) ,Let’s Encrypt, Nginx ,How to Install nginx and google PageSpeed on Ubuntu 16.04 (Xenial […]
[…] 정석 (아파치 & nginx) ,Let’s Encrypt, Nginx ,How to Install nginx and google PageSpeed on Ubuntu 16.04 (Xenial […]